If you have owned a car for a while now, you probably came across the term “U-joint,” otherwise known as Universal Joint. A car with a faulty U-joint will not run for long. Coupled with transmission fluid leakage, a broken U-joint can cause damage to the driveshaft, brake line, transmission line, and many other parts of the vehicle. But, how long can you drive with a bad U-joint, and is it safe?
You may be wondering how long can you drive with a bad U-joint. Some vehicles won’t work at all without a properly functioning U-joint. Knowing about the correct operation as well as maintenance of universal joints can save you from spending hundreds, if not thousands at the repair shop.
The u-joint doesn’t fail overnight; it’s a gradual process. Left unattended, a failure in this component can be dangerous while you’re driving, not just expensive. The good news, however, is that there are telltale symptoms to let you know that the u-joints in your vehicle need attention.
- What’s A Universal Joint?
- Functions & Purpose
- Signs Of A Bad U-Joint
- Universal Joint Failing
- Reasons Behind Failure
- Replacing U-Joints
- Inspecting U-Joints
- Step-by-Step Guide
- Driving With A Bad U-Joint
- Replacement Cost
Universal Joint
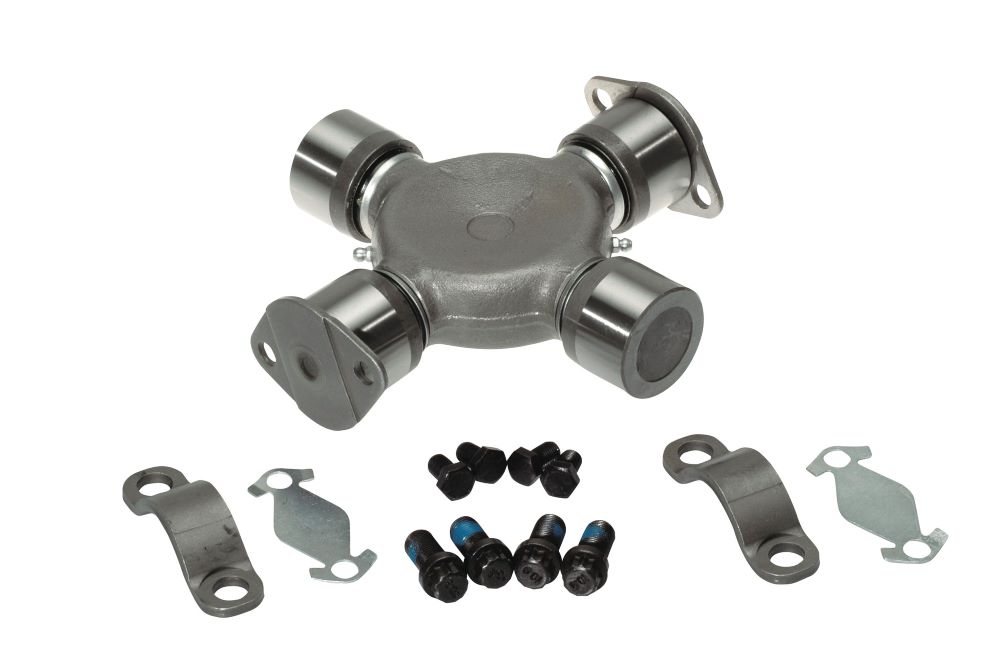
Universal joints or U-joints are X-shaped components generally made of steel featuring a bearing cap on each end. It connects the rigid driveshaft of the vehicle to the transmission and allows it to rotate freely.
They are parts of a system designed to enable the rotating crankshaft to deliver rotating energy to the rear wheels (applicable for rear-wheel-drive vehicles). Thanks to the adjustable connection on the driveshaft’s end, the driveshaft can move up and down. It can also move at an angle to the car’s engine when the vehicle goes over uneven surfaces.
For instance, pickup trucks come with u-joints at both ends of the driveshafts. Without universal joints, a vehicle could not build enough suspension for any wheel travel. The driveline would catch on every pothole and bump.
FWD vehicles come with CV joints or constant velocity joints. Their function is similar to that of universal joints. Here’s a helpful video guide for you to check out to understand the working mechanism of u-joints.
What Is A Universal Joint
As cars do not move on super-flat surfaces, driveshafts have to be able to move up and down alongside the suspension while they rotate. This ensures an uninterrupted supply of power to the drive wheels. Universal joints power this motion while letting the driveshaft turn continuously.
A U-joint also supplements the height misalignment within the rear axle and the transmission. Since the rear wheels and rear axle of the vehicles move independently of the other parts of the vehicle, a direct driveshaft originating from the engine would not work. Connected to the axle, it would flex or bind when the car encountered bumps. When the driveshaft turns, the flexible action of the universal joints makes up for the misalignment.
Symptoms Of Bad U Joints
So, how can you know when your car’s universal joints are going bad? Look out for these signs.
How Long Can You Drive With A Bad U Joint, Symptoms #1: Squeaking Noises
The bearing components used in universal joints are lubricated at the factory, but they might not get a lubrication fitting to facilitate further greasing once the vehicle is out on the roads, limiting their functionality. With every rotation of the driveshaft, the bearing portion twists a little, causing the grease to evaporate or wear off the bearing cup.
As a result, the bearing dries up, metal-to-metal contact is initiated, and the universal joint bearings squeak when the rotation happens. However, the squeak generally disappears when the vehicle goes faster than 5 to 10 mph because there are other environmental noises in play. The squeak is to be considered a warning that you have to get the U-joints serviced by a certified professional.
If you invest a little in maintaining the U-joints, you can surely extend the life of these parts.
How Long Can You Drive With A Bad U Joint, Symptoms #2: Clunk And Ring
https://www.youtube.com/watch?v=abOwIrmo3HI&pp=ygUMYmFkIHUgam9pbnRz
If you can hear a little clunk with a ringing noise followed when you shift the gear from Drive to Reverse, this is another symptom. This indicates that although the U-joint has enough space to let the driveshaft rotate slightly, it comes to a hard stop once the power is reversed.
Usually, this is the next stage after deterioration due to inadequate grease in the bearing. Greasing or servicing the bearings will not do much to reduce the damage, but it may extend the service life.
How Long Can You Drive With A Bad U Joint, Symptoms #3: Vibration
Vibration across the whole vehicle typically means that the U-joints have done enough damage to the driveshaft and it is now unbalanced. The vibration will be of higher frequency than that of, let’s say, an out-of-balance set of wheels. A worn U-joint gradually causes damage to other parts of the car – including the transmission.
This is when you have to get the universal joint replaced by a professional mechanic. The mechanic can be expected to choose high-quality replacement U-joints featuring a grease fitting.
How Long Can You Drive With A Bad U Joint, Symptoms #4: Leakage Of Transmission Fluid
Transmission fluid leakage from the transmission’s rear is generally a result of a bad universal joint. After the vibrations stated above, if you still do not get your vehicle checked, the U-joint will move on to damaging the transmission tail shaft bushing and output shaft seal, which then causes a transmission fluid leak.
That being said, there may be many other reasons behind a leaky transmission. It is best to have the transmission inspected to decide which changes are necessary.
How Long Can You Drive With A Bad U Joint, Symptoms #5: Vehicle Cannot Move
The final stage of a bad U-joint is a vehicle incapable of moving anymore. When the universal joint breaks down, the driveshaft will drop, and no longer be able to transfer power. At that point, you may not be able to get away with just a U-joint replacement; the entire driveshaft might need to be changed.
How Long Can You Drive With A Bad U Joint
In simple words, a vehicle cannot function with a U-joint, so it fails. It is much more complicated than it sounds. A lot of damage can be involved in all the cases. The driveshaft assembly can loosen and fall off. It can also cause extensive damage to the vehicle’s underside and perhaps the driveline too.
While small in stature, a U-joint can end up costing you thousands of dollars in repairs. The worst scenario is when a U-joint fails mid-drive, literally inviting an accident to happen.
Neglecting a U-joint replacement even though symptoms have started to display can bring many severe consequences. It’s best to take precautions while you can.
What Causes U Joints To Go Bad
Over time, normal wear and tear take a toll on every component of the car, not just the U-joint. It is completely possible that the universal joint was at the end of its service life after serving its set time. But, the majority of times, the problem can be linked to a lack of greasing of the bearing, rough driving, or modifications made to vehicles which can affect driveshaft speed or angle.
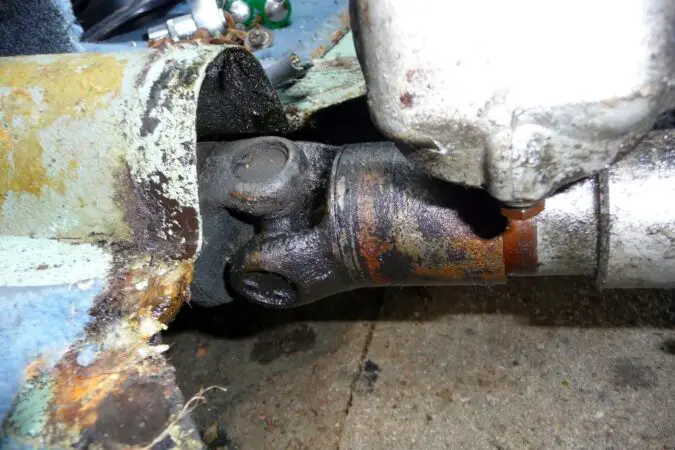
“Moggy’s innards: propeller shaft U-joint” by *SHERWOOD* is licensed under CC BY-NC-SA 2.0 .
If you can figure out the cause of a faulty U-joint, it is easy to choose a solution for it. These are some of the most common reasons a universal joint fails:
Causes Of Failure #1: General Wear And Tear
U-joints are designed to live a long life but, no matter how carefully maintained, anything mechanical is prone to error. With adverse driving conditions, hard-driving, and enough miles on the car, the universal joints may give up faster than expected.
In the case of SUVs and trucks that are mostly driven off-road or used or hauling, the U-joints have more work on their hands. Thus, they need to be replaced more frequently than with a regular drive.
If the original universal joint provided decent mileage, it is best to replace it with an OEM option.
Causes Of Failure #2: Loss Of Grease
As mentioned multiple times before, lack of lubrication is harmful to the health of U-joints. Since they are simply a set of bearings, they need to have the right chassis grease to function optimally. A few U-joints are made to receive lubrication maintenance, which can be quite helpful in lifted, off-road, or heavy-duty vehicles.
Fortunately, you can buy U-joints in a “greasable” design for most vehicles. It makes greasing maintenance easy.
Causes Of Failure #3: Hazard Duty
Putting your car through extreme applications such as off-roading, racing, or continual payload towing will put additional strain on the driveshaft, accelerating the wear of the U-joint.
For vehicles that need to haul heavy loads daily, it is essential to get heavy-duty U joints to pair.
Causes Of Failure #4: Lifting Without Aligning
When you install a lift kit in the vehicle, it could change the driveshaft’s angle, exerting more pressure on the U-joints and ultimately reducing their lifespan. Examine driveshaft alignment post lifting to ensure functionality inside the specs. The driveshaft angle has to be within tolerances; modify if required. Plus, a stronger universal joint is a good idea in general.
Causes Of Failure #5: Souped Up Engines
Made modifications or gotten a bigger engine to improve your vehicle’s horsepower? Keep in mind that you will also be increasing the strain exerted on the driveshaft, as well as the U-joints.
For vehicles with horsepower more than standard, the U-joints have to be equally strong.
How Long Do U Joints Last
Technically, U-joints last forever – at least that is how they were designed. Although they are not supposed to depreciate over time, it happens. In addition, U-joints could break; it is not a rare incident.
We can easily predict the service life of some parts of the vehicle, like shocks. But that is not the case with U-joints. Universal joints could last decades, but they can also break despite the vehicle being new. Check the universal joints after every oil change.
There are two to three U-joints in a regular rear-wheel-drive vehicle. Vehicles with longer wheelbases, like buses, are equipped with three or more U-joints. The more the number of U-joints, the higher the chance of failure.
How To Check U Joints
Instead of waiting for something to go bad and then repairing it, it is a good habit to examine the U-joints regularly. If not at every oil change, get them checked at least twice a year.
- Step 1: As the vehicle moves, listen carefully and try to take note of any metallic or squeaking noises coming from below it. Sounds like those are generally indicative of an under-greased or dried-out universal joint.
- Step 2: Vibrations will start to happen when the joint is almost about to fail. If you detect vibrations, do not ignore them.
- Step 3: Pull over in a safe location such as a parking lot or a driveway. Keep the engine running and have your foot on the brake. In that position, shift gear from Park to Reverse. You should hear a banging or clunking sound during the process. If you feel a sudden jump with the sound, it indicates a wobbly universal joint.
- Step 4: Park the vehicle and flat ground and turn the engine off. Keep the car in park with the wheels chocked and attempt to move the driveshaft. Slow turn it and note any reactions in the U-joint. When turned, loose joints allow the driveshaft to rotate as much as ¼ to ½” in either direction.
- Step 5: Stick a big, flat screwdriver inside the yoke connecting the driveshaft to the differential or transmission yoke. Now turn the shaft by moving the screwdriver up and down. Observe any movements in the driveshaft that would be indicative of a loose U-joint.
Examine the U-joints with a flashlight. Look out for broken or chipped bearing caps, missing bearings, rust, or retaining clips in the yokes.
U Joint Replacement
While you may be tempted to try out actually how long can you drive with a bad U-joint, but it is highly recommended that you replace it
Tools You Will Need
- Jack
- 2 jack stands
- Wrenches (7/16 or ½”)
- Ratchet and socket (7/16 or ½”)
- Hammer
- ⅝” heavy-duty metal billet or socket
- Ear protection
- New U-joint(s)
- Snap ring pliers
- Grease cartridge
- Grease gun
- U-joint tool/Ball joint (for alternate method)
How To Remove U Joints Without A Press
Now, let’s see how you can process it without a U-Joint tool.
Step 1
Lift the car into the air, either with the front lower than the rear or level. This will stop the fluid leaking from the transmission. 2 nuts and bolts, alternatively, 4 four bolts are used to secure the rear yoke to the differential yoke – a number that changes depending on the make, model, and year of the vehicle.
These are generally 7/16” or ½”. Once taken out, you can remove the driveshaft by pushing it forward, down, and once more rearward.
Step 2
Smack the yoke using a hammer to release any tension on the snap ring/C clip. Based on the type used, tension is exerted on the snap rings in various directions. Hold the yoke assembly/U-joint by the joint cups and strike the yoke sharply.
Use a pair of pliers to remove the inner snap ring from the yoke’s upper half, or the outer C-clip/snap ring from the lower cup. Repeat the process on the other side to extract both the snap rings/C-clips.
Step 3
Using a press, heavy-duty socket, or a hammer and punch, squeeze the bearing cups outside the toke. Rotate the yoke/driveshaft 180 degrees. Repeat on the other side.
Pro tip: A few heavy-duty yokes feature bearing cups attached on both sides. If that is the case for you, do steps 2 and 3 for the second yoke too.
At every step of the procedure, you must be extremely careful with the driveshaft. To decrease weight on the car, manufacturers keep the driveshaft fairly lightweight and it can dent easily. A dented driveshaft is an unbalanced driveshaft. Then you are going to have a whole different vibration source to deal with.
Step 4
With tape or a rubber band, fasten the 2 opposing bearing cups to the replacement joint. At the same time, remove the 2 other caps and push the U-joint’s polished end into the openings of the yoke. Keep a bearing cup below any of these openings and slightly tap the yoke. After the cup is properly seated, use a hammer to secure the yoke. Install the snap ring/C-slip and repeat on the other side.
Step 5
Inspect for binding on the installed joint. You may have to tap it properly to loosen the binding.
Step 6
For this part, you will have to slide under your vehicle. Insert the driveshaft’s transmission end into the tail shaft until it bottoms out. Move to the differential end and lift the tail of the driveshaft to get it into place.
Step 7
Take off the rubber band or tape and set the joint cups into the differential’s pinion yoke. Install the clamps to fasten the U-joint to the yoke and secure the bolts and nuts. Install the snap rings/C-clips to lock them in place.
Step 8
Lower the vehicle to ground level, start the engine, and note any clunking in the U-joints/driveshaft.
How To Replace U Joints
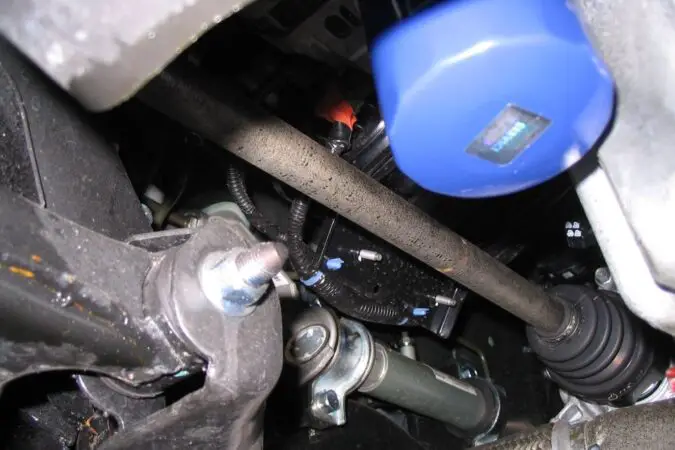
“Persona driveshaft no dampener” by eugeneat is licensed under CC BY-NC-ND 2.0 .
And now, let’s discuss processing with a U-Joint tool.
Step 1
Mark the yoke and driveshaft sides that will have the new U-joint replacement installed. With the vehicle’s driveshaft out, place it on a flat workbench or any comfortable work surface.
Step 2
Find the right size press cup fit for the driveshaft yoke and position the cup on top of the threaded rod. Get another cup that is bigger than the U-joint cups but smaller than the opening of the yoke.
Step 3
Position the U-joint tool against the yoke. Secure the threaded rod with your hand. When you remove the snap rings/C-clips, it will secure the caps. You may have to remove the tension in a clip with the press before flipping it around to extract the other clip.
Step 4
Continue fastening the threaded rod to remove one cap from the yoke. Turn the tool around and redo the process to remove the opposite cap as well as the “cross” of the U-joint. Keep the cross at a 90-degree angle to the yoke – that will make the process slightly easier.
Step 5
Secure the caps to the new joint using tape or a rubber band. Lodge the cross inside the yoke. Push it as far as you can to one and slide the new cap into the yoke, as far as possible. With the threaded rod’s end against the cap, set the tool to slide that cap inside.
Step 6
Press down the threaded rod to push the cap against the yoke until it is seated properly. Remove the tool and flip it before repeating on the other side. Make sure it is easy to pivot the joints.
Step 7
Going under the vehicle, push the transmission yoke inside the tail shift. Raise the shaft’s rear into position and install the latch the flanges/install the straps, making sure it lines up with the marks made previously.
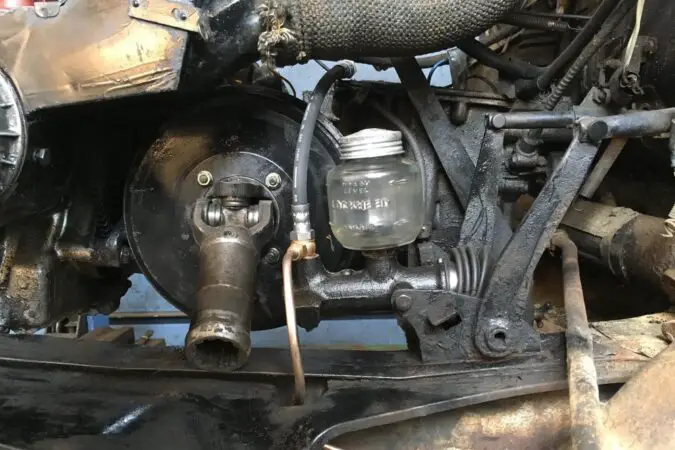
“AZ. Brakes and driveshaft done. Looks as though it may go.” by tonysladeuk is licensed under CC BY-NC 2.0 .
Is It Safe To Drive
It is crucial to address a bad U-joint as soon as you suspect there might be problems with the component. A completely failed universal joint can make the driveshaft fall out of the undercarriage, causing serious damage to the vehicle, if not an accident.
U Joint Replacement Cost
Usually, U-joints are serviceable parts that can be changed without needing to replace the whole driveshaft. If you want to get professional help for your U-joint replacement, expect to pay anywhere between $200 to $450 depending on the make, model, and year of the vehicle as well as the extent of the damages.
You can save coins by doing the replacement yourself. It is fairly simple and requires one to one and a half hours at the most. You can get a replacement U-joint for under $50.
Finishing Thoughts
Never ignore the signs your car is giving you, especially if they may be related to a poor U-joint. Address the problem right away and save yourself from a potentially punching-hole-in-wallet bill. Knowing the condition of your car parts will help you estimate how long can you drive with a bad U-joint.
It is necessary to inspect for transmission leakage. Lubricants can extend the service life of a U-joint but you may have to replace it down the line; keep that in mind.
Extra Universal Joints Facts
- U joints connect the driveshaft to the differential and allow for relative motion between the two shafts while transmitting torque.
- U joints consist of four trunnion bearings held in place by caps and pins that allow the shafts to rotate relative to each other.
- U joints operate at a certain angle, called the operating angle, and can fail if the angle exceeds the design limit.
- U joints are available in a variety of sizes and configurations, with the 3/4″ size being the most common.
- Symptoms of a bad U joint include vibration, noise, difficulty steering, and the wheels coming off.
- A bad U joint can cause severe damage to the car and should be fixed as soon as possible.
- The most common cause of a bad U joint is wear and tear, while other causes may include contamination, lack of lubrication, or impacts.
- U joints should be inspected periodically and kept clean to prevent contamination.
- U joints should be lubricated every 12,000 miles or more frequently depending on driving habits and conditions.
- U joints will eventually need to be replaced, with a general recommendation of every 100,000 miles or sooner if wear or damage is noticed.


