
Anyone who’s worked with automotive wiring and electrics will know that they’re typically a massive pain in the behind to work with. So, how can you tap and splice into your car’s wire without cutting it?
Tapping and splicing into an existing wire is often a must when you’re adding new electrical accessories or if you’re performing troubleshooting. Otherwise, cutting a wire could instead compromise the electrics.
Thankfully, you could easily tap into a wire without needing to cut it with one of four techniques… 1) using a wire tap connector, 2) soldering into the wire, 3) using piercing probes, or 4) self-stripping connectors.
Although, while you’re doing this, it’s worth bearing in mind crucial safety precautions, like ensuring that you’re picking the right connectors, being wary of overloading the circuit, and insulating it properly.
- Tapping/splicing VS cutting the wire
- Best techniques for splicing/tapping wires
- Safety precautions & tips
- Common mistakes to avoid
Tapping vs Cutting A Wire
So, you might be wondering, why even tap or splice the wire? Tapping into the wire without cutting it is a common task in automotive electrical work, particularly when adding accessories or troubleshooting.
This process involves connecting a new wire to an existing one without needing to sever the original wire. It’s vital for maintaining the integrity of the vehicle’s wiring harness and ensuring safety and reliability.
But, how about cutting that wire, instead? Well, cutting a wire can actually compromise a car’s electrical system. It may instead lead to short-circuiting, unreliable connections, and can be difficult to revert.
As an alternative method, by tapping or splicing into an existing wire without cutting, you could maintain the original wiring’s and electrics’ integrity, making it easier to remove or alter connections in the future.
Best Way To Splice Wires
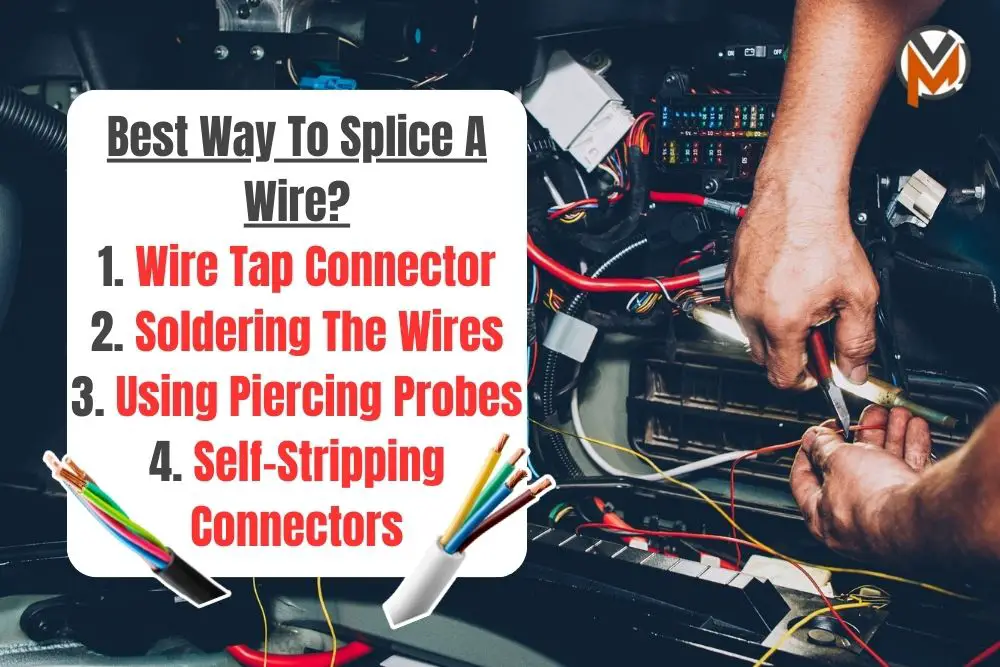
As I mentioned earlier, there are 4 reliable techniques that you could practice to properly and safely tap or splice into a wire without cutting it. These include (click on each one to skip to that specific section):
- Using a wire tap connector
- Soldering the wire
- Using some piercing probes
- Using self-stripping connectors
So, down below, I’ve prepped a detailed guide, as well as step-by-step instructions for each one on how to correctly, effectively, and safely tap or splice into your car’s wire without cutting it…
METHOD 1: Using A Wire Tap Connector
First off, this method involves clamping a connector onto the wire. It’s a straightforward technique, often used for low-stress connections, wiring, and electrics.
However, it’s essential that you choose high-quality connectors, since poor-quality ones can lead to loose connections or damage the wire (more on that later).
STEP BY STEP INSTRUCTIONS:
- STEP 1 – Select the Right Connector:
- Choose a connector that matches the wire gauge. High-quality connectors are important for a reliable connection.
- STEP 2 – Prepare the Wire:
- Once that’s done, clean the wire where you will attach the connector. Ensure that it’s free from any dirt or grease.
- STEP 3 – Clamp the Connector:
- Place the wire tap connector over the wire. The connector should have a metal blade that will pierce the insulation to make contact with the wire inside.
- STEP 4 – Secure the Connection:
- Use some pliers to clamp down on the connector firmly. This action pushes the metal blade into the wire, establishing a connection.
- STEP 5 – Test the Connection:
- After attaching the connector, test the connection with a multimeter to ensure it’s secure and conducting electricity properly.
METHOD 2: Soldering The Wires
For a more permanent and reliable connection, soldering is recommended. This involves stripping a small section of the wire’s insulation, and soldering the new wire onto it.
Then, you can begin insulating the wire’s connection. This technique is more durable and provides a much better electrical connection. However, this does require some skill.
STEP BY STEP INSTRUCTIONS:
- STEP 1 – Strip the Wire:
- First up, you need to carefully strip a small section of the insulation from the wire where you want to make the connection.
- STEP 2 – Prepare the Soldering Iron:
- Next, you’ll have to heat up your soldering iron. Make sure that it’s at the right temperature for the type of solder you are using.
- STEP 3 – Tin the Wires:
- Apply a small amount of solder to the exposed wire and the wire you’re adding. This process is otherwise called ‘tinning’ and makes the actual soldering process easier.
- STEP 4 – Join and Solder the Wires:
- Hold the tinned sections of both wires together and apply the soldering iron. The heat will melt the solder, joining the wires together.
- STEP 5 – Insulate the Connection:
- Once the solder cools down, insulate the connection with heat-shrink tubing or electrical tape to prevent short circuits.
METHOD 3: Using Some Piercing Probes
Next up, these are usually used for temporary connections, especially during diagnostics. They pierce the insulation and make contact with the conductor without cutting the wire.
However, they should be used cautiously as they can damage the wire if not used correctly. Once again, a bit more on precautionary steps and tips further down below.
STEP BY STEP INSTRUCTIONS:
- STEP 1 – Choose the Right Probe:
- Before you even begin, make sure you select a piercing probe that’s appropriate for the wire size.
- STEP 2 – Pierce the Insulation:
- Now, gently press the probe against the wire’s insulation until it pierces through and makes contact with the conductor.
- STEP 3 – Connect the Test Equipment:
- You can now attach your diagnostic equipment, such as a multimeter, to the probe.
- STEP 4 – Remove Carefully:
- After you’re done with the testing, carefully remove the probe to minimize damage to the wire’s insulation.
METHOD 4: Adapting Self-Stripping Connectors
Lastly, these connectors slice through the insulation and make contact with the wire inside. They are easy to use but may not be as reliable as soldering, especially in high-vibration environments like cars.
STEP BY STEP INSTRUCTIONS:
- STEP 1 – Select the Connector:
- First up, you’ll need to choose a self-stripping connector that’s suitable for the wire gauge.
- STEP 2 – Insert the Wire:
- Then, once you’re done, you can now place the wire into the connector. The connector will have a special blade to pierce the insulation.
- STEP 3 – Crimp the Connector:
- Use a crimping tool to press the connector, which forces the blade to slice through the insulation and make contact with the wire.
- STEP 4 – Ensure Security:
- Last but not least, before you end it, check the connection for firmness and conduct a test for electrical continuity.
Best Practices For Safe Wire Tapping & Splicing
Overall, tapping or splicing into a wire without cutting it is a valuable skill in automotive electrical work. It allows you to add accessories or diagnose issues without compromising your car’s wiring integrity.
By following the right techniques, as I’ve outlined earlier, you can now ensure reliable and safe electrical connections in your vehicle. Additionally, it’s worth bearing in mind your safety and that of your car.
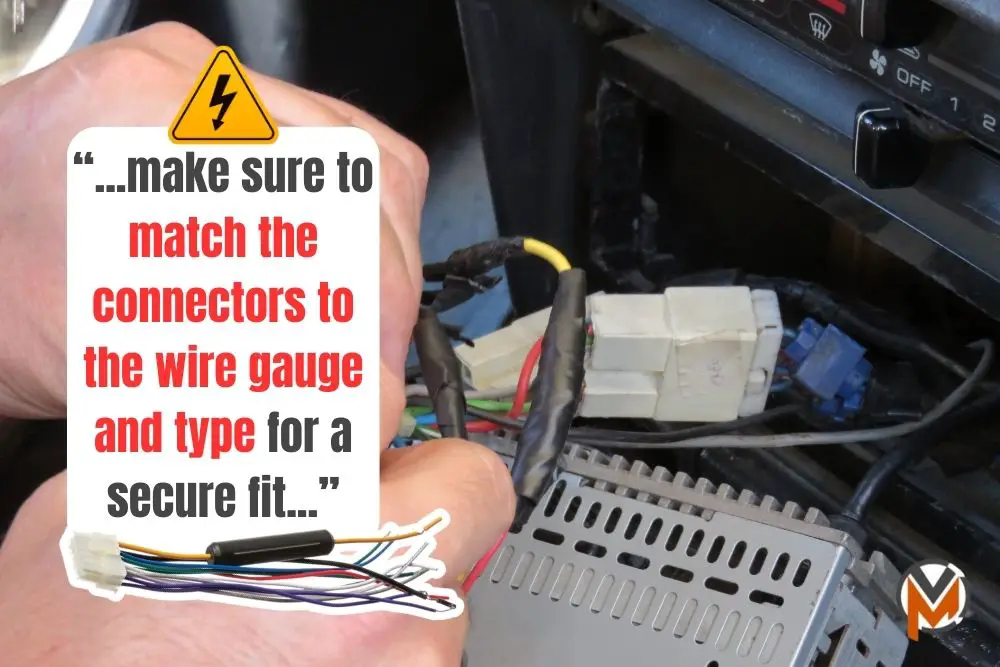
Here are some extra precautions and safety tips that I’d recommend you bear in mind while you’re doing this:
- Connector Suitability – Make sure you match the connectors to the wire gauge and type for a secure fit.
- Avoid Overloading – Tapping or splicing into a heavily loaded wire can cause overheating. So, make sure you assess the wire’s current load before tapping.
- Insulation Integrity – After making the connection, use some quality insulation materials to then cover the exposed area.
- Use Quality Tools – It can also help to expedite the process by investing in good-quality stripping, soldering, and crimping tools for reliable connections.
- Regular Inspections – Throughout the process, ensure that you periodically inspect tapped connections, especially in high-vibration or moisture-prone areas.
Common Mistakes To Avoid
With that in mind, there are some pretty common, oft-repeatable mistakes with splicing or tapping into a wire (without cutting it) that you should be aware of. And, ideally, try to avoid repeating these mistakes:
- Cheap Connectors – Low-quality connectors can often lead to rather unreliable connections and potential electrical hazards. I’d highly recommend investing a bit more in good-quality connectors for this.
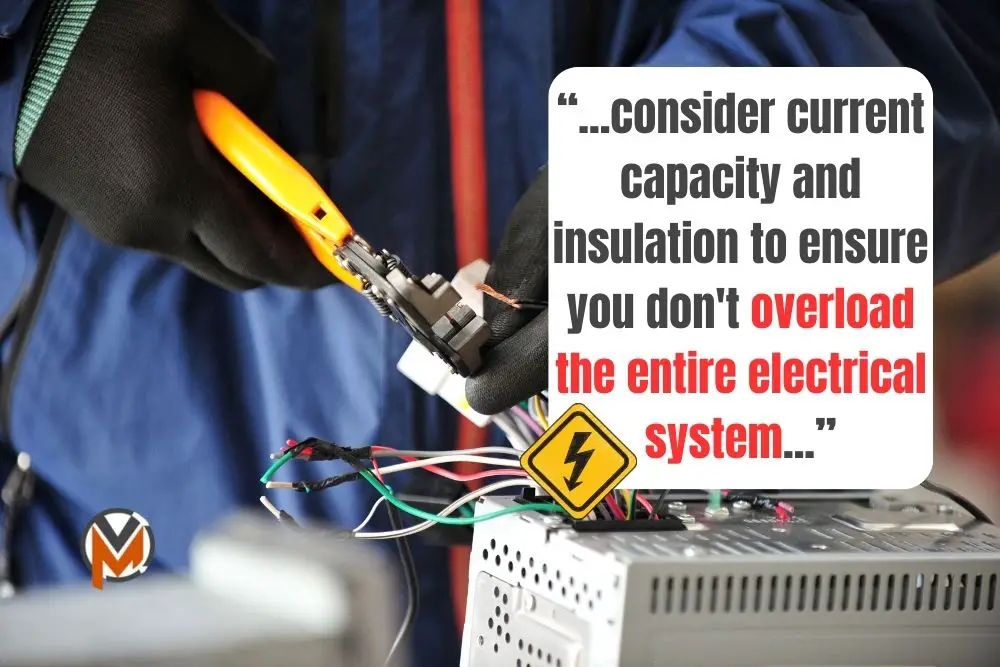
- Ignoring Wire Ratings – Remember to always consider the wire’s current capacity, as well as its insulation type before making connections. This is to make sure you don’t overload the entire electrical system.
- Excessive Stripping – Another common mistake is excessively stripping the wires. Over-stripping can expose too much wire, increasing the risk of short circuits, and other problems with your car’s electrical system.